
Download the Nine Edges Challenge eBook
The eBook will guide you through the Nine Edges Challenge, step by step. No getting lost!
Risk Free
100% refund if you are unhappy with the product
View more information

Overview
- Distance: 22 miles; 36 km
- Time: 10 hours
- Total Ascent: 1097 m; 3600 ft
- GPX File: Download (desktop only) – What is a GPX file?
- Map: The Peak District OL1 and OL24 The Peak District
- Route: View route in Google Maps
Nine Edges Challenge Summary
The Nine Edges Challenges is located in the Peak District. The challenge consists of walking the ridge of nine prominent edges: Derwent, Stanage, Upper Burbage, Lower Burbage, Froggatt, Curbar, Baslow, Gardoms and Birchen. The 22-mile circular route is a great entry to day-long hikes. There are fantastic views along the way with only small amounts of inclines. Along the walk you will be entertained by the hundreds of climbers that visit the Peak District’s ridges for bouldering.
The Nine Edges Challenge is not signposted. A map and compass is highly recommended to complete the hike.
The Nine Edges Challenge is a day-long hike but without too many inclines. The total ascent for the day is 1097m. The majority of the walk is spent walking along the top of the ridges, similar to the Edale Skyline Challenge. The Nine Edges Challenge can be used as a training hike for the Yorkshire Three Peaks Challenge or the National Three Peaks Challenge.
Route

View route in Google Maps.
Start and Finish
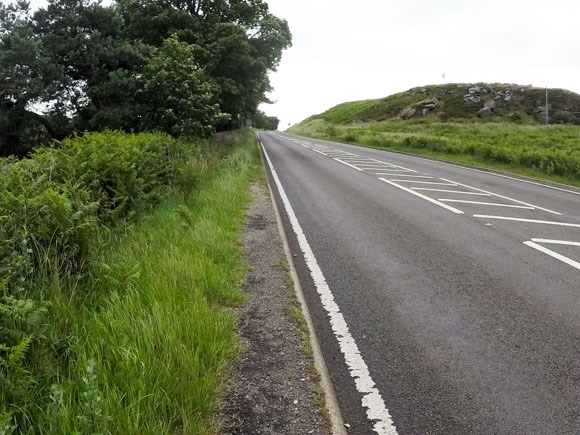
Start of the Nine Edges Challenge
The starting point for the Nine Edges Challenge is the Fairholmes Upper Derwent Car Park and Visitor Centre. The address for the car park is
Fairholmes
Bamford
Hope Valley
S33 0AQ
View car park in Google Maps.
Car parking is £5 for the full day. The pay and display machines are currently cash only and do not accept card payments. There are toilets at the car park.
End of the Nine Edges Challenge
The end point of the Nine Edges Challenge is Birchen Edge Car Park next to the Robin Hood Inn. The car park doesn’t have an address, but is located next to the The Robin Hood Inn. The address for the Robin Hood Inn is
Robin Hood Inn
Chesterfield Rd
Baslow
Bakewell
DE45 1PQ
The car park is a National Trust Car Park and costs £4 for the full day. The pay and display machines are currently cash only and do not accept card payments.
View car park in Google Maps.
Travelling between the start and finish of the Nine Edges Challenge
The distance between Fairholmes Car Park and Birchen Car Park is 16 miles.
The easiest method is to take two cars to the challenge. Park one car at Birchen Car Park and drive to Fairholmes car park and start the challenge. It is a 35-minute drive between the car parks.
You could use the same method and cycle between the car parks if you are completing the challenge alone. The cycle will take approximately 1 hour 30 minutes depending on your cycling ability. This is only an option if you are confident in your hiking and cycling fitness.
There is no direct public transport between the 2 car parks.
Order of the Nine Edges
1. Derwent
2. Stanage
3. Upper Burbage
4. Lower Burbage
5. Froggatt
6. Curbar
7. Baslow
8. Gardoms
9. Birchen

Estimated Timings and Checkpoints
There is no set time to complete the Nine Edges Challenge. Completing the walk under 10 hours would be a good time to ensure you’re completing the challenge in daylight. Use the table below to estimate your finish time when completing the challenge.
| Checkpoint | Time |
|---|---|
| Derwent Edge | 1 hour 45 mins |
| Stanage Edge | 3 hours 45 mins |
| Upper Burbage Edge | 5 hours 15 mins |
| Froggatt Edge | 7 hours 15 mins |
| Baslow Edge | 8 hours |
| Birchen Car Park | 10 hours |
Equipment

It is important to be prepared for the Nine Edges Challenge. You will carry all clothing, food, water and equipment in your backpack. There are no stores along the way. The weather can change drastically in the Peak District and it’s important to take warm and waterproof clothes to make your challenge comfortable.
You can view a full equipment list that covers everything required to complete the Nine Edges Challenge.
Map
The Nine Edges Challenge is split across two OS maps. The Peak District OL1 and OL24 The Peak District. Plot your route on maps before travelling to the Nine Edges Challenge.
GUIDED WALKS
If the thought of navigating with a map and compass is daunting, you can have a guide from Lost Earth Adventures direct the way for you. The groups generally finish between 10-12 hours but always accommodate to the slowest walker. Visit their Nine Edges page for more information.
Start of Nine Edges Challenge
From Fairholmes car park, follow the path along the wooden fence near the disabled parking.


Keep right and walk over the bridge towards Derwent Dam.

Take the path leading to the left towards Derwent Dam.

Follow the stairs to the top and turn left.

Go through the gate and follow the wide road along the edge of the Derwent Reservoir.


Take the right turn into the woods. The path is marked by a signpost for “Public Footpath to Bradfield and Strines”. There are two paths leading away from the signpost, follow the path leading to the right.


You will pass the signpost for Walkers Clough.


Keep left at the small wooden signpost.

After a short walk you will reach another wooden signpost. Turn left again.

At the cross section keep left and follow the path leading uphill.

Go straight on at the pile of stones.

Follow the path leading to the right at the next wooden signpost.

Go over the stile following the signpost for Strines.

You will see Lost Lad and Back Tor in the background along the grassed route.

Take the grassed path to the left.


A trig marks the top of Lost Lad.

Keep following the path towards Back Tor. Back Tor is 538 metres high, which is just under half of the total ascent for the Nine Edges walk.


You have great views of Ladybower Reservoir when walking from Back Tor to Derwent Edge. Derwent Edge is signposted. If you reach the Derwent Edge signpost within 1 hour 45 minutes, you are on track for a 10-hour challenge.


The Wheel Stones (also known as The Coach and Horses – from the A57 they look like a coach and horses) are a large rock formation. It’s a good spot for a rest stop or a little scramble.


The next intersection is signposted for “Derwent” and “Moscar”. Turn left, following the sign for Moscar.

The path may be boggy in this area after rainfall.


Follow the path leading down the stone wall to Moscar House.

Go through the first gate and the second gate is on your right.


The path leads to the road. Turn right onto the road and then left onto the A57, following the road sign for Sheffield.

There is just enough space for you to walk alongside the road.

Cross over to the right-hand side of the A57 and keep following the road until you reach a metal gate and a stile. Climb over the stile.


Turn right at the signpost, following the sign for Stanage Edge.

Turn left as the path splits into two and right at the next split. There’s a prominent stone with WM engraved. Stanage Edge is a long ridge and is simple to follow. Reaching Stanage Edge within 3 hours 45 minutes puts you in a good position to complete the Nine Edges Challenge in 10 hours.


A trig pinpoints High Neb.


Download the Nine Edges Challenge eBook
The eBook will guide you through the Nine Edges Challenge, step by step. No getting lost!
Risk Free
100% refund if you are unhappy with the product
View more information
Take the right turn, coming off the Long Causeway.


Keep right at the two wooden posts.

Keep walking along the ridge until you reach the next trig.


Turn left and follow the main path.

In the distance you can see the path leading to Ringinglow Road.


Follow the path at the side of the road and cross over Upper Burbage Bridge to the car park furthest away. Go through the gate.


The path is the least obvious choice. Keep near the fence, following the signpost for “Bridleway”. This path leads you across Upper and Lower Burbage.


At the cairn, take the path leading straight on.


Go through the gate and turn right onto Hathersage Road (A6187).

Cross the road and go through the next gate. There is a National Trust sign for Longshaw.


Go through the gate, following the sign for “Visitor Centre” and cross the road into Longshaw Estate.


Turn right at the “Estate Walks” sign.

Pass through the two wooden gates.


Keep going straight at the next signpost. Following the sign for Grouse Inn.

Go through the gate and turn right onto the A625. There is a small path at the side of the road to follow.

Pass through the stile just after the Grouse Inn.


Go through the wooden gate and turn left.


You will reach the A625 again. Cross the road and continue through the stile next to the white gate. This path leads across Froggatt Edge.


There are a couple of splits in the path along Froggatt Edge. Take the right-hand splits if you wish to walk closer to the edge of Froggatt Edge or keep left to follow the main path.

Follow the right turn away from the main path. This turn leads to Curbar Edge.

Continue through the wooden gate. At the signpost, turn right, following the sign for Baslow Edge.


Cross Clohall Lane and keep following the path. At the next split, turn right. This leads to Baslow Edge.


After walking along Baslow Edge, there’s a small shortcut leading back to the main path.

It’s easy to miss the right turn. If you cannot locate the right turn, turn right when you rejoin the main path (marked in red).


Turn left before the wooden gate. The path leads through a wood, over a bridge before reaching the A621.


Cross the A621 and continue following the path.


Turn left at the next cross section and follow the stone wall. It’s easy to spot for the large rock.


Head for the gap in the stone wall and continue in the same direction. You’ll eventually reach a stone wall to walk alongside, leading to Gardom’s Edge.


Just after Gardom’s Edge, turn right at the large tree and stone wall and go through the gate.


It’s not a well-defined path but keep heading in the same direction.

Take the path leading up the incline. A trig is at the top.


Follow the path behind the trig leading to Nelson’s Monument and Birchen’s Edge. This is the final Edge of the Nine Edges Challenge! It’s now a short walk to the finish line.


Keep walking in the same direction and follow the path as it leads to the left.

Go through the final gate and turn right onto the B6050 towards the Robin Hood Inn.


That’s the end of the Nine Edges Challenge! Congratulations!
Download the Nine Edges Challenge eBook
The eBook will guide you through the Nine Edges Challenge, step by step. No getting lost!
Risk Free
100% refund if you are unhappy with the product
View more information
Frequently Asked Questions
What equipment do you need to complete the Nine Edges Challenge?
You need two maps (The Peak District OL1 and OL24 The Peak District), a compass, warm clothes (it may be cold along the ridges, even in summer) and a backpack to keep it all in. Visit the hiking equipment page to ensure you have all of the required equipment.
Can you complete the Nine Edges Challenge all year round?
The Nine Edges Challenge can be completed on any day of the year. It can be cold and windy due to the open nature of the countryside, especially outside of summer. If you wish to complete the challenge in sunshine with long hours of daylight, it is recommended to plan your trip between April-September.
How long does it take to complete the Nine Edges Challenge?
There is no set time to complete the Nine Edges Challenge. Completing the challenge under 10 hours is a good time.
What terrain is the Nine Edges Challenge?
The route is a combination of grass (which can become boggy after rainfall), gravel, steps, mud, tarmac and rocks.
Can you complete the Nine Edges Challenge in trainers?
It is not recommended to complete the challenge in trainers. Due to the diverse terrain, lack of ankle protection, inclines, declines and unpredictable weather, trainers are not suitable footwear for the challenge.
Are dogs allowed on the route?
Dogs are allowed in the Peak District. During the breeding season of spring and early summer, new-born lambs and ground-nesting birds are particularly vulnerable to harm from dogs. Always use a short lead if you can’t rely on your dog’s obedience.
How much food/water will I need to take?
A backpack is required to carry enough food and drink for the full day’s hike. It is recommended to take at least 3 litres of water. The weather and temperature needs to be taken into consideration and adjust the required amount of water as necessary. A hot day will require more fluids. Take as much food as you can comfortably carry and high-energy foods are desirable due to their size.
How much training is required?
Some people will be able to complete the Nine Edges Challenge without training; others may require a couple of months. The level of training required is unique to each individual depending on current fitness levels and age. It is recommended to practice at least one long walk (12+ miles) with inclines and declines to assess the difficulty. You could complete the Kinderscout via Jacobs ladder walk (8.5 miles; 14 km) in the Peak District as way to test your fitness. You could also complete one or two of the Yorkshire Three Peaks or tackle one of the National Three Peaks. You could climb England’s third highest peak: Helvellyn (8 miles; 13 km).
Is it free to complete?
The Nine Edges Challenge is free to complete. You can donate to the Peak District, who maintain the pathways.
Where do you start the Nine Edges Challenge?
The starting point for the Nine Edges Challenge is the Fairholmes Upper Derwent Car Park and Visitor Centre.
Are there any toilets on the route?
There are public toilets in the Fairholmes Car Park and Visitor Centre at the start of the challenge; at the Longshaw Estate, which is quite far into the challenge; and at the end of the challenge for paying customers at the Robin Hood Inn.
Do you need any specialist climbing equipment?
No. The Nine Edges Challenge is completed by walking.
Do you need a guide to complete the challenge?
No. You can arrange your own walk with a map and compass. If you wish to attend a guided walk, contact Lost Earth Adventures.
Can you drop out if you cannot complete the challenge?
As the Nine Edges Challenge isn’t a loop walk, it is difficult to pull out of the challenge once you have started. There are many villages along the route to stop your walk, but it may be difficult returning to your starting/finish point.